
Copy your
MCP server URL
Open Integrations in your PicoPixel account, then copy your personal MCP server URL.
https://app.picopixel.io/mcp/stream?userToken=<YOUR_PRIVATE_TOKEN>Verbind je AI-assistent met de PicoPixel LVGL MCP-server. Maak en bewerk embedded schermen, widgets, thema’s, lettertypen en iconen in je actieve project.
Open Integrations in your PicoPixel account, then copy your personal MCP server URL.
https://app.picopixel.io/mcp/stream?userToken=<YOUR_PRIVATE_TOKEN>In Claude desktop or claude.ai, go to Customize → Connectors. Name it PicoPixel and paste the URL.
Ask Claude to use the PicoPixel LVGL MCP server to create or edit an LVGL interface.
Open Integrations in your PicoPixel account, then copy your personal MCP server URL.
https://app.picopixel.io/mcp/stream?userToken=<YOUR_PRIVATE_TOKEN>Open ChatGPT Plugins, click Add (+) → Add Custom MCP Server, then name it PicoPixel and paste your copied URL into Server URL.
Create and install the custom plugin, then ask ChatGPT to use the PicoPixel LVGL MCP server to create or edit an LVGL interface.
Open Integrations in your PicoPixel account, then copy your personal MCP server URL.
https://app.picopixel.io/mcp/stream?userToken=<YOUR_PRIVATE_TOKEN>Replace <server-url> in the command below with the URL you copied, then paste the completed command into Claude Code and run it. Ask Claude Code to use the PicoPixel LVGL MCP server to create or edit an LVGL interface.
claude mcp add --transport http PicoPixel-LVGL "<server-url>"Open Integrations in your PicoPixel account, then copy your personal MCP server URL.
https://app.picopixel.io/mcp/stream?userToken=<YOUR_PRIVATE_TOKEN>Replace <server-url> in the command below with the URL you copied, then paste the completed command into OpenClaw and run it. Ask OpenClaw to use the PicoPixel LVGL MCP server to create or edit an LVGL interface.
openclaw mcp add PicoPixel-LVGL --url "<server-url>" --transport streamable-httpOpen Integrations in your PicoPixel account, then copy your personal MCP server URL.
https://app.picopixel.io/mcp/stream?userToken=<YOUR_PRIVATE_TOKEN>Replace <server-url> in the command below with the URL you copied, then paste the completed command into Hermes and run it. Ask Hermes to use the PicoPixel LVGL MCP server to create or edit an LVGL interface.
hermes mcp add PicoPixel-LVGL --url "<server-url>"Open Integrations → MCP client JSON configuration → Copy Config.
{"mcpServers":{"picopixel-lvgl":{"url":"https://app.picopixel.io/mcp/stream?userToken=<YOUR_PRIVATE_TOKEN>"}}}{
"mcpServers": {
"picopixel-lvgl": {
"url": "https://app.picopixel.io/mcp/stream?userToken=<YOUR_PRIVATE_TOKEN>"
}
}
}Add the copied config to your client’s MCP settings and save.
Ask your assistant to use the PicoPixel LVGL MCP server to create or edit an LVGL interface.
Maak een gezondheidsdashboard met al mijn gezondheidsgegevens van mijn Apple Watch, waaronder activiteit, hartslag, slaap en dagelijkse doelen.
Ik bekijk eerst het project en de beschikbare tools. Daarna voer ik de wijzigingen uit.
Controleer de verbinding en de toegang tot het actieve project.
Bekijk hoe de PicoPixel LVGL-editor werkt.
Zoek de tools en bewerkingen op die voor deze opdracht nodig zijn.
Bekijk de huidige schermen, widgets en beschikbare assets.
Het project is klaar. Ik voeg eerst de indeling en inhoud toe en werk daarna de opmaak uit.
Maak de widgets aan en zet ze op hun plaats.
Stel lettertypen, kleuren en afstanden in.
De wijzigingen zijn toegepast. Ik controleer het scherm nog even voordat ik afrond.
Lees de aangepaste widgets terug om het resultaat te controleren.
De wijzigingen staan op je PicoPixel-canvas. Je kunt ze nu bekijken en verder aanpassen.
Klaar in PicoPixel
Geef dit racedashboard een warm licht thema met oranje accenten. Behoud de indeling en maak de meters goed leesbaar.
Ik bekijk de stijlen van het dashboard en maak daarna een warm, licht thema met oranje accenten.
Controleer de verbinding en de toegang tot het actieve project.
Zoek de beschikbare themafuncties en stijlbewerkingen op.
Bekijk de kleuren, meters en voortgangsbalken van het dashboard.
Ik kies een warme, gebroken witte achtergrond, donkere tekst en oranje accenten.
Maak herbruikbare kleuren voor de achtergrond, tekst en accenten.
Pas het palet toe op de meters, labels en voortgangsbalken.
Het palet is toegepast. Ik controleer of het contrast goed is en de kleuren overal bij elkaar passen.
Controleer de nieuwe stijlen en of de indeling is behouden.
Het lichte thema is klaar. De meters en voortgangsbalken hebben oranje accenten; de indeling is behouden.
Klaar in PicoPixel
Genereer Doto, Playfair en JetBrains Mono op 12, 18 en 24 px. Voeg kleur- en lijniconen toe en toon alles op één scherm.
Ik maak eerst de verschillende lettergroottes aan en voeg daarna iconen uit meerdere pakketten toe.
Maak Doto aan op 12, 18 en 24 px en voeg voorbeelden toe.
Maak Playfair aan in dezelfde drie groottes.
Voeg JetBrains Mono toe om de lettertypevoorbeelden compleet te maken.
De lettertypevoorbeelden zijn klaar. Nu voeg ik kleureniconen en lijniconen toe.
Voeg de wereldbol, camera en het cadeau uit Fluent UI toe.
Voeg het landschap, muziekicoon en de lamp uit Flat Color toe.
Voeg een raket, boek en planeet uit andere icoonpakketten toe.
Controleer de gegenereerde lettertypen, iconen en het voorbeeldscherm.
Je lettertypen en iconen zijn klaar voor gebruik in PicoPixel.
Klaar in PicoPixel
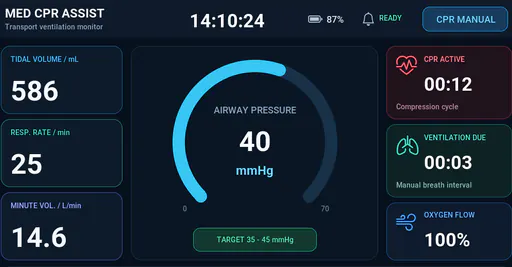
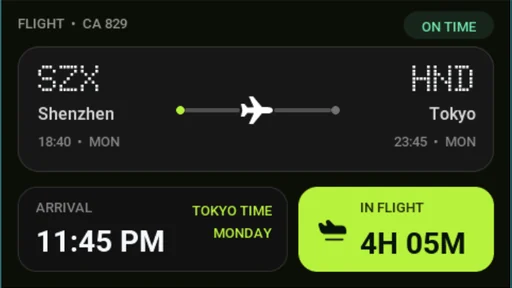
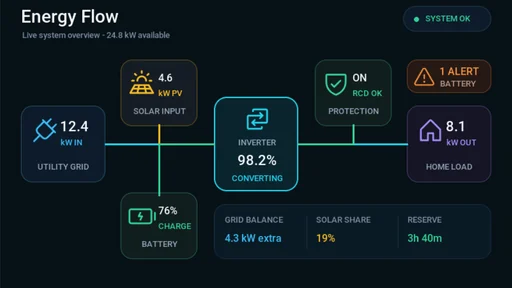
Open deze drie projecten in de editor, bekijk hoe ze zijn opgebouwd en pas ze aan voor je eigen interface.
Bekijk alle voorbeeldenPicoPixel LVGL MCP is an MCP server that connects your AI assistant to the PicoPixel LVGL editor through the Model Context Protocol (MCP). It lets your assistant inspect, create, and edit native LVGL screens, widgets, and resources in your active project, so you can describe what you want and see the result on your canvas.
Your assistant can inspect existing screens, create and arrange LVGL widgets, adjust layouts and styles, work with fonts and icons, and create reusable components and color themes. Changes are made directly in your PicoPixel project and remain editable.
Choose your assistant in the setup section above and follow its connection steps. Depending on the client, you can sign in through a connector or use the personal MCP server URL from your PicoPixel account’s Integrations settings. Then open the project you want to work on. Read the PicoPixel LVGL MCP setup and agent settings guide.
The setup guide covers Claude, ChatGPT, Cursor, Claude Code, OpenClaw, Hermes, and Grok Bot. Other MCP-capable clients can use the general setup instructions with the connection details from your PicoPixel account.
Yes. Keep the project you want your assistant to work on open in a signed-in PicoPixel browser tab. MCP works with the active file through that tab, so the editor needs to stay connected while your assistant reads or changes the design.
Yes. Read-only mode lets your assistant inspect the project without changing it. To create or edit a design, enable write access in PicoPixel. Your assistant also needs your account to have edit permission for the active file.
Yes. MCP creates and updates native PicoPixel screens and widgets. You can review the result on the canvas, adjust it manually, undo changes, or ask your assistant to refine it further.
Yes. Different account types have different MCP call limits to help our servers maintain a responsive, reliable experience for all users. View the call limits for each account type on the pricing page.