
Copy your
MCP server URL
Open Integrations in your PicoPixel account, then copy your personal MCP server URL.
https://app.picopixel.io/mcp/stream?userToken=<YOUR_PRIVATE_TOKEN>AI アシスタントを PicoPixel LVGL MCP サーバーに接続。開いているプロジェクトに、画面、ウィジェット、テーマ、フォント、アイコンを作成し、編集できます。
Open Integrations in your PicoPixel account, then copy your personal MCP server URL.
https://app.picopixel.io/mcp/stream?userToken=<YOUR_PRIVATE_TOKEN>In Claude desktop or claude.ai, go to Customize → Connectors. Name it PicoPixel and paste the URL.
Ask Claude to use the PicoPixel LVGL MCP server to create or edit an LVGL interface.
Open Integrations in your PicoPixel account, then copy your personal MCP server URL.
https://app.picopixel.io/mcp/stream?userToken=<YOUR_PRIVATE_TOKEN>Open ChatGPT Plugins, click Add (+) → Add Custom MCP Server, then name it PicoPixel and paste your copied URL into Server URL.
Create and install the custom plugin, then ask ChatGPT to use the PicoPixel LVGL MCP server to create or edit an LVGL interface.
Open Integrations in your PicoPixel account, then copy your personal MCP server URL.
https://app.picopixel.io/mcp/stream?userToken=<YOUR_PRIVATE_TOKEN>Replace <server-url> in the command below with the URL you copied, then paste the completed command into Claude Code and run it. Ask Claude Code to use the PicoPixel LVGL MCP server to create or edit an LVGL interface.
claude mcp add --transport http PicoPixel-LVGL "<server-url>"Open Integrations in your PicoPixel account, then copy your personal MCP server URL.
https://app.picopixel.io/mcp/stream?userToken=<YOUR_PRIVATE_TOKEN>Replace <server-url> in the command below with the URL you copied, then paste the completed command into OpenClaw and run it. Ask OpenClaw to use the PicoPixel LVGL MCP server to create or edit an LVGL interface.
openclaw mcp add PicoPixel-LVGL --url "<server-url>" --transport streamable-httpOpen Integrations in your PicoPixel account, then copy your personal MCP server URL.
https://app.picopixel.io/mcp/stream?userToken=<YOUR_PRIVATE_TOKEN>Replace <server-url> in the command below with the URL you copied, then paste the completed command into Hermes and run it. Ask Hermes to use the PicoPixel LVGL MCP server to create or edit an LVGL interface.
hermes mcp add PicoPixel-LVGL --url "<server-url>"Open Integrations → MCP client JSON configuration → Copy Config.
{"mcpServers":{"picopixel-lvgl":{"url":"https://app.picopixel.io/mcp/stream?userToken=<YOUR_PRIVATE_TOKEN>"}}}{
"mcpServers": {
"picopixel-lvgl": {
"url": "https://app.picopixel.io/mcp/stream?userToken=<YOUR_PRIVATE_TOKEN>"
}
}
}Add the copied config to your client’s MCP settings and save.
Ask your assistant to use the PicoPixel LVGL MCP server to create or edit an LVGL interface.
Apple Watch の健康データをまとめたダッシュボードを作って。アクティビティ、心拍数、睡眠、毎日の目標を表示して。
プロジェクトと利用できるツールを確認してから、依頼された内容を反映します。
接続状態と、開いているプロジェクトへのアクセスを確認します。
PicoPixel LVGL エディタでの作業方法を確認します。
依頼を実現するために必要なツールと操作を調べます。
現在の画面、ウィジェット、利用できるアセットを確認します。
プロジェクトを確認できました。レイアウトと内容を配置し、見た目を整えます。
ウィジェットを作成して配置します。
フォント、色、余白を設定します。
変更を反映しました。最後に画面の状態を確認します。
更新後のウィジェットを読み取り、結果を確かめます。
PicoPixel のキャンバスに変更を反映しました。内容を確認し、そのまま編集を続けられます。
PicoPixel で確認できます
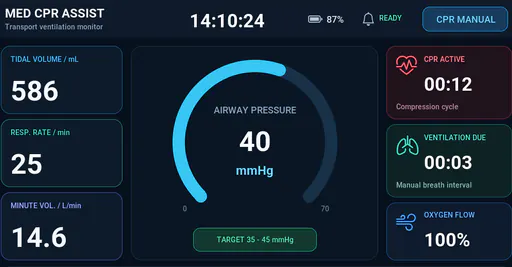
このレーシングダッシュボードを、オレンジを差し色にした暖かみのあるライトテーマにして。レイアウトを保ちながら、ゲージを読みやすくして。
ダッシュボードのスタイルを確認し、オレンジを差し色にしたライトテーマを作ります。
接続状態と、開いているプロジェクトへのアクセスを確認します。
テーマとスタイルに必要な操作を調べます。
現在の配色、ゲージ、プログレスバーを確認します。
背景は暖かみのあるオフホワイト、文字は濃い色にし、オレンジで強調します。
背景色、文字色、差し色を再利用可能な色として作成します。
ゲージ、ラベル、プログレスバーに配色を適用します。
配色を適用しました。画面全体のコントラストと統一感を確認します。
スタイルの変更と、レイアウトが維持されていることを確認します。
ライトテーマができました。ゲージとプログレスバーの差し色をオレンジで統一し、元のレイアウトは維持しています。
PicoPixel で確認できます
Doto、Playfair、JetBrains Mono をそれぞれ 12、18、24 px で生成して。カラーとアウトラインのアイコンも追加して、すべてを 1 つの画面に並べて。
まず各サイズのフォントを作り、その後で複数のパックからアイコンを追加します。
Doto を 12、18、24 px で作り、見本を配置します。
Playfair も同じ 3 サイズで作成します。
JetBrains Mono を追加し、フォント見本を揃えます。
フォント見本が揃いました。次にカラーとアウトラインのアイコンを追加します。
Fluent UI の地球、カメラ、ギフトのアイコンを追加します。
Flat Color の風景、音楽、電球のアイコンを追加します。
ほかのパックからロケット、本、惑星のアイコンを追加します。
生成したフォント、アイコン、見本の画面を確認します。
フォントとアイコンを PicoPixel で使えるようになりました。
PicoPixel で確認できます
PicoPixel LVGL MCP is an MCP server that connects your AI assistant to the PicoPixel LVGL editor through the Model Context Protocol (MCP). It lets your assistant inspect, create, and edit native LVGL screens, widgets, and resources in your active project, so you can describe what you want and see the result on your canvas.
Your assistant can inspect existing screens, create and arrange LVGL widgets, adjust layouts and styles, work with fonts and icons, and create reusable components and color themes. Changes are made directly in your PicoPixel project and remain editable.
Choose your assistant in the setup section above and follow its connection steps. Depending on the client, you can sign in through a connector or use the personal MCP server URL from your PicoPixel account’s Integrations settings. Then open the project you want to work on. Read the PicoPixel LVGL MCP setup and agent settings guide.
The setup guide covers Claude, ChatGPT, Cursor, Claude Code, OpenClaw, Hermes, and Grok Bot. Other MCP-capable clients can use the general setup instructions with the connection details from your PicoPixel account.
Yes. Keep the project you want your assistant to work on open in a signed-in PicoPixel browser tab. MCP works with the active file through that tab, so the editor needs to stay connected while your assistant reads or changes the design.
Yes. Read-only mode lets your assistant inspect the project without changing it. To create or edit a design, enable write access in PicoPixel. Your assistant also needs your account to have edit permission for the active file.
Yes. MCP creates and updates native PicoPixel screens and widgets. You can review the result on the canvas, adjust it manually, undo changes, or ask your assistant to refine it further.
Yes. Different account types have different MCP call limits to help our servers maintain a responsive, reliable experience for all users. View the call limits for each account type on the pricing page.