
Copy your
MCP server URL
Open Integrations in your PicoPixel account, then copy your personal MCP server URL.
https://app.picopixel.io/mcp/stream?userToken=<YOUR_PRIVATE_TOKEN>अपने AI असिस्टेंट को PicoPixel LVGL MCP सर्वर से जोड़ें। खुले हुए प्रोजेक्ट में एम्बेडेड स्क्रीन, विजेट, थीम, फ़ॉन्ट और आइकन बनाएँ और बदलें।
Open Integrations in your PicoPixel account, then copy your personal MCP server URL.
https://app.picopixel.io/mcp/stream?userToken=<YOUR_PRIVATE_TOKEN>In Claude desktop or claude.ai, go to Customize → Connectors. Name it PicoPixel and paste the URL.
Ask Claude to use the PicoPixel LVGL MCP server to create or edit an LVGL interface.
Open Integrations in your PicoPixel account, then copy your personal MCP server URL.
https://app.picopixel.io/mcp/stream?userToken=<YOUR_PRIVATE_TOKEN>Open ChatGPT Plugins, click Add (+) → Add Custom MCP Server, then name it PicoPixel and paste your copied URL into Server URL.
Create and install the custom plugin, then ask ChatGPT to use the PicoPixel LVGL MCP server to create or edit an LVGL interface.
Open Integrations in your PicoPixel account, then copy your personal MCP server URL.
https://app.picopixel.io/mcp/stream?userToken=<YOUR_PRIVATE_TOKEN>Replace <server-url> in the command below with the URL you copied, then paste the completed command into Claude Code and run it. Ask Claude Code to use the PicoPixel LVGL MCP server to create or edit an LVGL interface.
claude mcp add --transport http PicoPixel-LVGL "<server-url>"Open Integrations in your PicoPixel account, then copy your personal MCP server URL.
https://app.picopixel.io/mcp/stream?userToken=<YOUR_PRIVATE_TOKEN>Replace <server-url> in the command below with the URL you copied, then paste the completed command into OpenClaw and run it. Ask OpenClaw to use the PicoPixel LVGL MCP server to create or edit an LVGL interface.
openclaw mcp add PicoPixel-LVGL --url "<server-url>" --transport streamable-httpOpen Integrations in your PicoPixel account, then copy your personal MCP server URL.
https://app.picopixel.io/mcp/stream?userToken=<YOUR_PRIVATE_TOKEN>Replace <server-url> in the command below with the URL you copied, then paste the completed command into Hermes and run it. Ask Hermes to use the PicoPixel LVGL MCP server to create or edit an LVGL interface.
hermes mcp add PicoPixel-LVGL --url "<server-url>"Open Integrations → MCP client JSON configuration → Copy Config.
{"mcpServers":{"picopixel-lvgl":{"url":"https://app.picopixel.io/mcp/stream?userToken=<YOUR_PRIVATE_TOKEN>"}}}{
"mcpServers": {
"picopixel-lvgl": {
"url": "https://app.picopixel.io/mcp/stream?userToken=<YOUR_PRIVATE_TOKEN>"
}
}
}Add the copied config to your client’s MCP settings and save.
Ask your assistant to use the PicoPixel LVGL MCP server to create or edit an LVGL interface.
मेरी Apple Watch के स्वास्थ्य डेटा का डैशबोर्ड बनाएँ, जिसमें गतिविधि, हृदय गति, नींद और रोज़ के लक्ष्य दिखें।
पहले प्रोजेक्ट और उपलब्ध टूल की जाँच करूँगा, फिर आपके बताए बदलाव करूँगा।
कनेक्शन और खुले हुए प्रोजेक्ट की पहुँच जाँचें।
PicoPixel LVGL एडिटर में काम करने के निर्देश पढ़ें।
इस काम के लिए ज़रूरी टूल और ऑपरेशन की जानकारी लें।
मौजूदा स्क्रीन, विजेट और उपलब्ध संसाधन देखें।
प्रोजेक्ट तैयार है। पहले लेआउट और सामग्री जोड़ूँगा, फिर उनका रूप सँवारूँगा।
विजेट बनाएँ और उन्हें सही जगह रखें।
फ़ॉन्ट, रंग और विजेट के बीच की दूरी तय करें।
बदलाव हो गए हैं। काम पूरा करने से पहले अपडेट की गई स्क्रीन जाँचूँगा।
बदले हुए विजेट फिर पढ़कर नतीजा जाँचें।
बदलाव PicoPixel कैनवास पर तैयार हैं। आप उन्हें जाँचकर आगे संपादित कर सकते हैं।
PicoPixel में तैयार
इस रेसिंग डैशबोर्ड को हल्के, गर्म रंगों की थीम दें, जिसमें नारंगी हाइलाइट हों। लेआउट वही रखें और गेज को पढ़ना आसान बनाएँ।
डैशबोर्ड के मौजूदा स्टाइल जाँचूँगा, फिर नारंगी हाइलाइट वाली हल्की, गर्म रंगों की थीम बनाऊँगा।
कनेक्शन और खुले हुए प्रोजेक्ट की पहुँच जाँचें।
थीम संसाधनों और स्टाइल बदलने के ऑपरेशन की जानकारी लें।
डैशबोर्ड के रंग, गेज और प्रोग्रेस बार देखें।
हल्का क्रीम बैकग्राउंड, गहरा टेक्स्ट और नारंगी हाइलाइट इस्तेमाल करूँगा।
बैकग्राउंड, टेक्स्ट और हाइलाइट के लिए दोबारा इस्तेमाल किए जा सकने वाले रंग बनाएँ।
गेज, लेबल और प्रोग्रेस बार पर रंग लागू करें।
रंग लागू हो गए हैं। अब पूरे डैशबोर्ड में उनका कंट्रास्ट और एकरूपता जाँचूँगा।
बदले हुए स्टाइल जाँचें और पक्का करें कि लेआउट वही है।
हल्के रंगों की थीम तैयार है। गेज और प्रोग्रेस बार में नारंगी हाइलाइट हैं और लेआउट पहले जैसा है।
PicoPixel में तैयार
Doto, Playfair और JetBrains Mono फ़ॉन्ट 12, 18 और 24 px में बनाएँ। रंगीन और आउटलाइन आइकन जोड़ें और सब कुछ एक स्क्रीन पर दिखाएँ।
पहले बताए गए आकारों में फ़ॉन्ट बनाऊँगा, फिर अलग-अलग पैक से आइकन जोड़ूँगा।
Doto को 12, 18 और 24 px में बनाएँ और उसके नमूने जोड़ें।
उन्हीं तीन आकारों में Playfair बनाएँ।
JetBrains Mono जोड़कर फ़ॉन्ट के नमूने पूरे करें।
फ़ॉन्ट के नमूने तैयार हैं। अब रंगीन और आउटलाइन आइकन जोड़ूँगा।
Fluent UI के ग्लोब, कैमरा और उपहार वाले आइकन जोड़ें।
Flat Color के दृश्य, संगीत और बल्ब वाले आइकन जोड़ें।
दूसरे पैक से रॉकेट, किताब और ग्रह के आइकन जोड़ें।
बनाए गए फ़ॉन्ट, आइकन और प्रीव्यू स्क्रीन जाँचें।
आपके फ़ॉन्ट और आइकन PicoPixel में इस्तेमाल के लिए तैयार हैं।
PicoPixel में तैयार
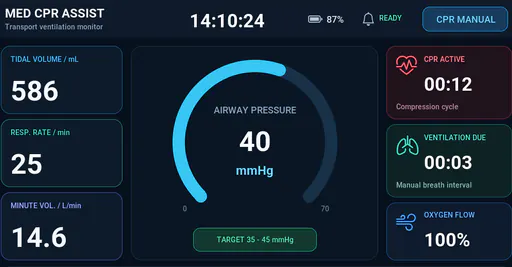
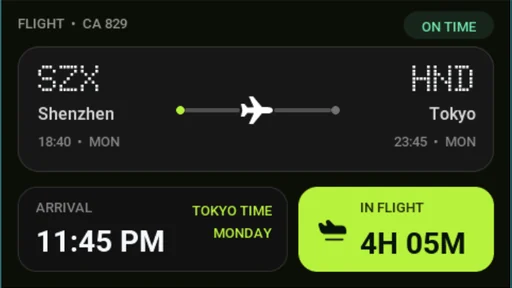
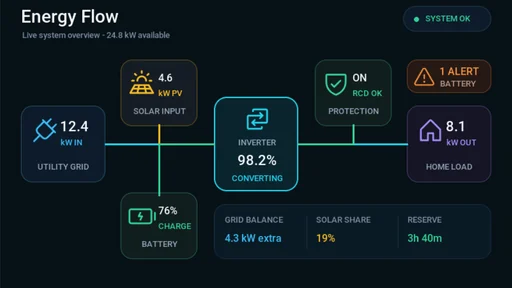
तीन एम्बेडेड इंटरफ़ेस प्रोजेक्ट, जिन्हें आप एडिटर में खोल सकते हैं, देखकर समझ सकते हैं और आगे संपादित कर सकते हैं।
सभी उदाहरण देखेंPicoPixel LVGL MCP is an MCP server that connects your AI assistant to the PicoPixel LVGL editor through the Model Context Protocol (MCP). It lets your assistant inspect, create, and edit native LVGL screens, widgets, and resources in your active project, so you can describe what you want and see the result on your canvas.
Your assistant can inspect existing screens, create and arrange LVGL widgets, adjust layouts and styles, work with fonts and icons, and create reusable components and color themes. Changes are made directly in your PicoPixel project and remain editable.
Choose your assistant in the setup section above and follow its connection steps. Depending on the client, you can sign in through a connector or use the personal MCP server URL from your PicoPixel account’s Integrations settings. Then open the project you want to work on. Read the PicoPixel LVGL MCP setup and agent settings guide.
The setup guide covers Claude, ChatGPT, Cursor, Claude Code, OpenClaw, Hermes, and Grok Bot. Other MCP-capable clients can use the general setup instructions with the connection details from your PicoPixel account.
Yes. Keep the project you want your assistant to work on open in a signed-in PicoPixel browser tab. MCP works with the active file through that tab, so the editor needs to stay connected while your assistant reads or changes the design.
Yes. Read-only mode lets your assistant inspect the project without changing it. To create or edit a design, enable write access in PicoPixel. Your assistant also needs your account to have edit permission for the active file.
Yes. MCP creates and updates native PicoPixel screens and widgets. You can review the result on the canvas, adjust it manually, undo changes, or ask your assistant to refine it further.
Yes. Different account types have different MCP call limits to help our servers maintain a responsive, reliable experience for all users. View the call limits for each account type on the pricing page.