Overview
This guide walks you through using pets in PicoPixel, from picking one out of the directory to dropping it into your own project and making it react to whatever your hardware is doing.
It builds directly on two other guides. If you want the underlying concept, read What is a sprite? first. If you want to publish a pet of your own, see How to submit a pet. This article sits in the middle: it's the practical, hands-on tutorial for using a pet someone has already built.
No prior animation work needed. If you can click "Add to project" and drag a widget onto a canvas, you can give your ESP32 or LVGL project a living, reacting character.
What are pets?
A pet is a sprite, a single widget that holds several different animations and lets you switch between them on demand. Each animation is a mode (also called a state or phase): "Idle," "Run right," "Jumping," and so on.
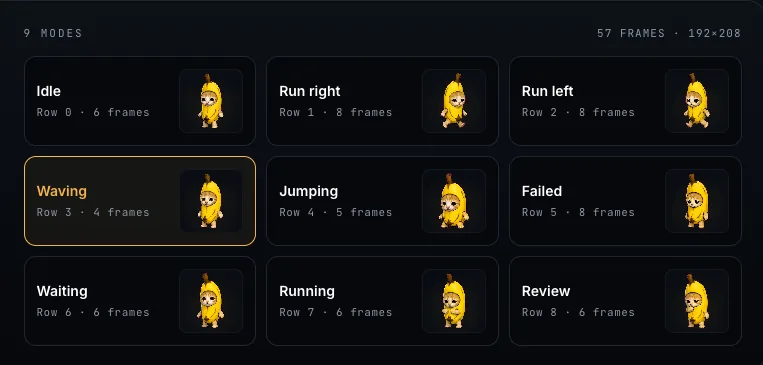
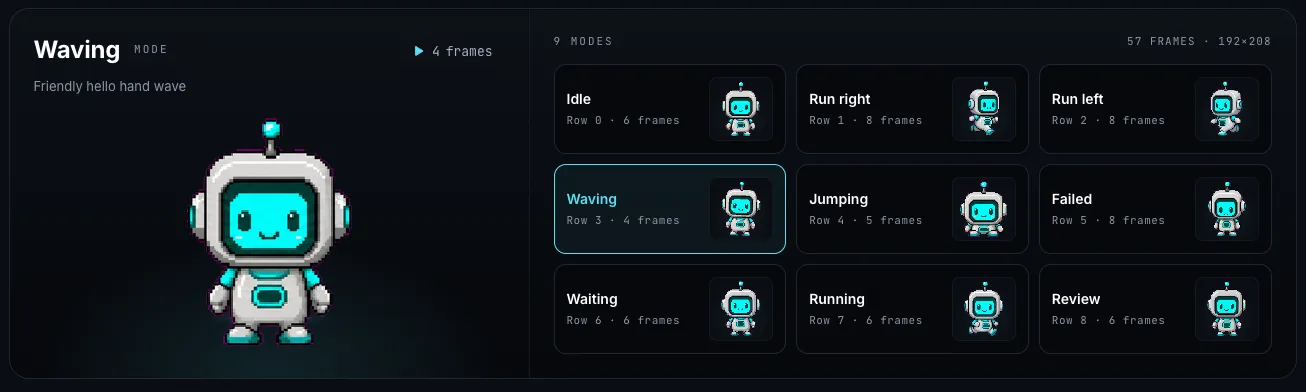
Pets sourced from Codex- or Petdex-style packs typically ship with 9 modes out of the box, for example Idle, Run right, Run left, Waving, Jumping, Failed, Waiting, Running, and Review. Each mode is its own little loop of frames, and you decide which one plays and when.
That's the whole idea: one widget, many behaviors, switched by your conditions.
On a technical level, LVGL has no native concept of a multi-state sprite, we built it on top of the LVGL animated image widget so you get all the modes wired up for you. See What is a sprite? for the full background.
Why use a pet?
Pets exist to give your ESP32 or LVGL project a spark of life. Instead of a static face or a single looping animation, the sprite reacts: it switches modes based on what's actually happening on your device.
The original inspiration is a code companion. Picture a Codex-style screen where a little character reacts to your coding session: idle while you think, "Review" while it reads through a diff, "Failed" when a build breaks. The pet mirrors what the app is doing.
PicoPixel takes that further: any action or trigger you can express, you can animate. A few examples:
- Switch to Jumping when a temperature reading crosses a threshold.
- Play Running while you're fetching data from an API, then drop back to Idle when the response lands.
- Fire Waving when a sensor detects motion, or Failed when a request times out.
If your project has states worth showing, a pet is a fast, expressive way to show them, with no animation code on your part.
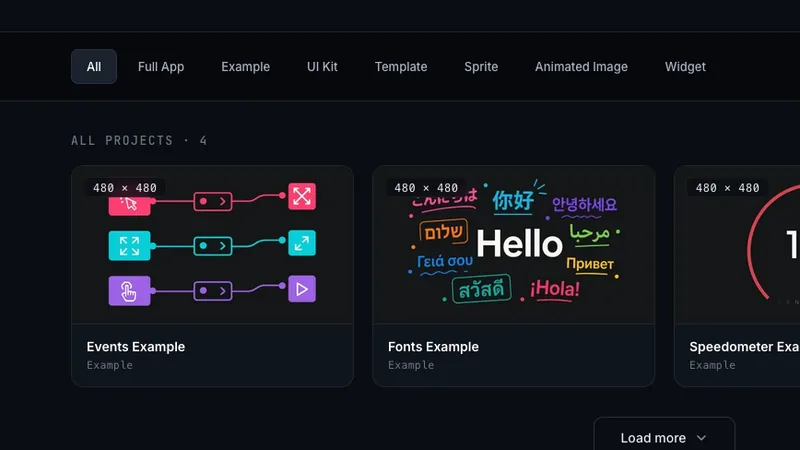
Pick a pet from the directory
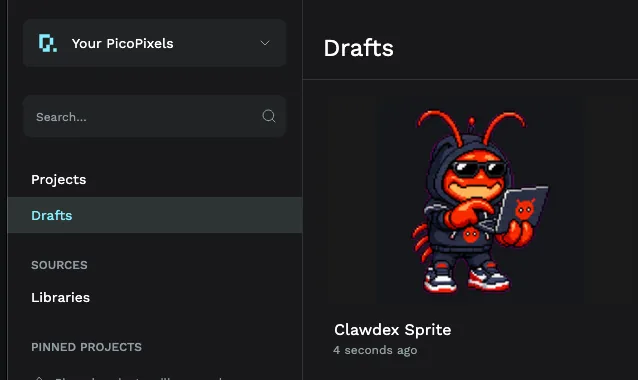
To get started, create a PicoPixel account, then head to the pets directory at picopixel.io/pets.
Browse the gallery, find a character you like, and open its detail page.

On the pet's detail page, click Add to project. PicoPixel imports the pet and drops it straight into your dashboard: no setup, no file wrangling.
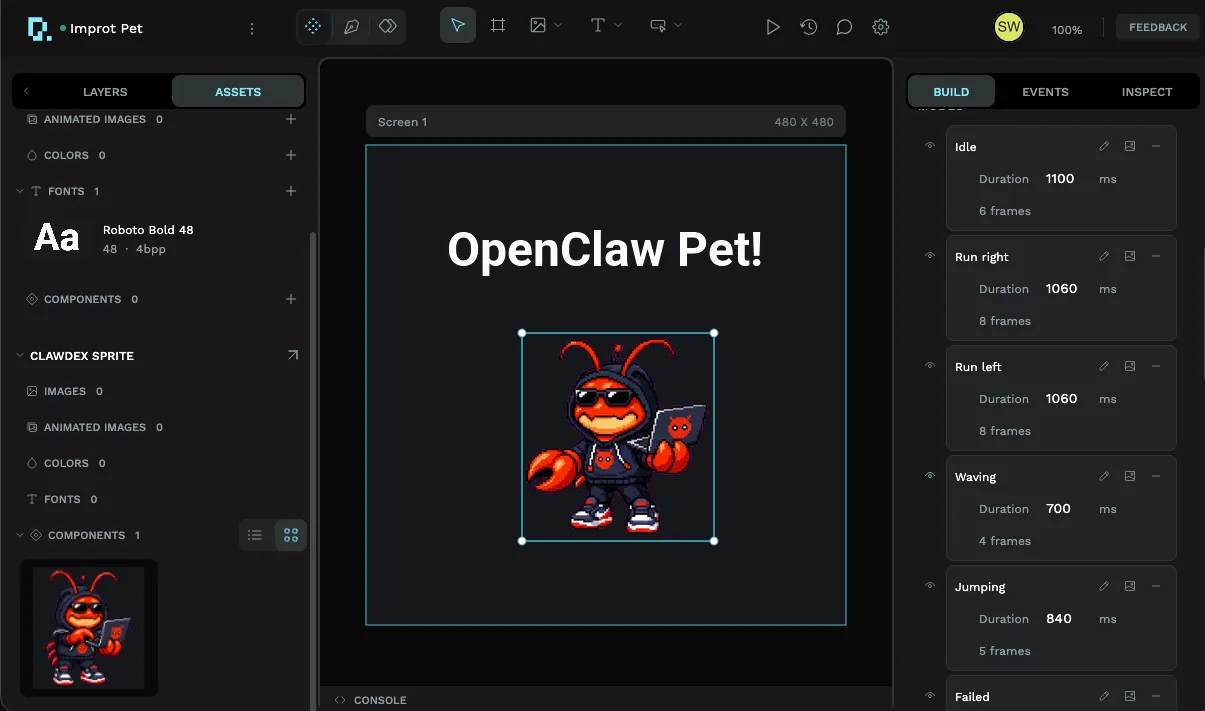
What you just got
Adding a pet creates a single project containing one Sprite widget, pre-loaded with every mode that pet ships with. Open it and you'll see the sprite on the canvas, with all its modes listed in the right-hand panel, Idle, Run right, Run left, Waving, Jumping, and the rest, each with its own frame count and duration.
If the Sprite widget itself is new to you, the What is a sprite? guide explains modes, frames, and durations in detail.
Switch to the Assets tab and you'll find the same sprite saved as a reusable component in the project's local library. This is the key to moving the pet into your real projects.
Three ways to use your pet
The pet's own project is really just a delivery vehicle. Here are three ways to get it into the project you actually want to build.
1. Copy and paste the layer
The quickest option: select the sprite layer in the pet project, copy it, open a different project, and paste. The sprite arrives with all its modes intact. Good for a one-off, if you only need this pet in one place, you're done.
2. Make the pet a library (recommended for reuse)
If you'll use the pet across several workspaces, turn its project into a library. Publishing a file makes its assets, including this sprite, available to import anywhere in your team's workspaces.
To publish:
- In the pet project, open the Assets tab and choose Add Library.
- Click Publish.
Then, to use it from another project:
- Open your new or existing workspace.
- Choose Add Library.
- Link the pet's library from the Shared libraries list, as shown below.
Once linked, the sprite shows up in that workspace's Assets. Drag and drop it onto the canvas and it loads fully pre-configured, with every mode for that pet ready to use.
Libraries are about reuse within your team, not publishing to the world. For exactly what a library holds, how publishing works, and where linked libraries appear, see Guide to libraries and reusable components.
3. Change the project's properties to match your hardware
You can also just edit the pet project's properties (screen size, target board) to match your device and build directly in it. This works, but it's not the recommended path: you lose the clean separation between the pet and your actual project, and the pet's project is set up as a showcase, not a template. Reach for options 1 or 2 first.
Wire it up: make the pet react
A pet that only ever plays Idle isn't doing much. The payoff comes from the event editor, where you say when to switch modes.
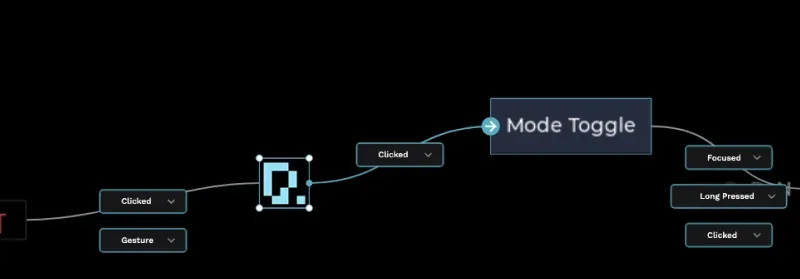
The pattern is simple: when something happens, switch to a mode. You pick the trigger, a button press, a value change, a timer, and choose the action Set Sprite Mode, then the mode to play.
In the screenshot below we added an event on a JUMP! button: when it's clicked, the action sets the sprite's mode to Jumping, so the pet leaps the moment the button is pressed.
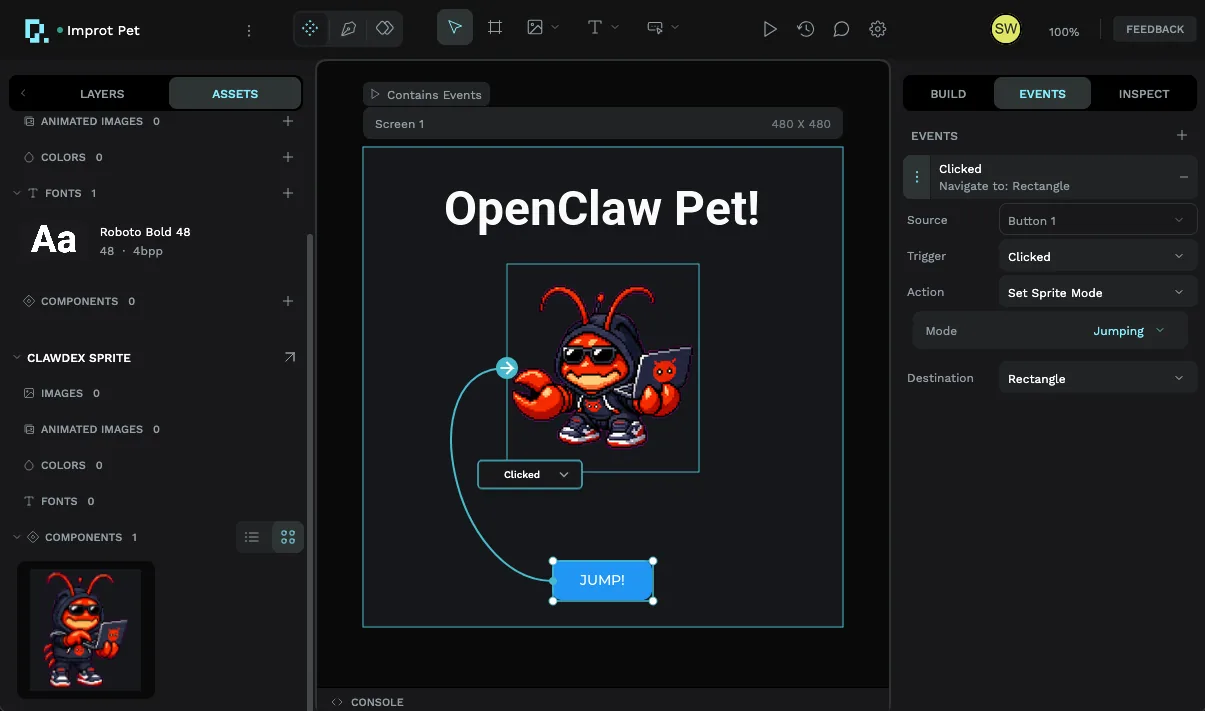
Swap the trigger for whatever your project exposes, a sensor reading, an API call finishing, a timer firing, and the same wiring makes the pet react to it. For the full rundown of triggers, sources, and actions, see Using the event editor.
A few things to keep in mind
A handful of practices will keep your pet looking good and running well on real hardware.
- Remove modes you won't use. This is strongly recommended. Every mode you keep is more frames stored in memory, and unused ones are pure overhead. Trimming down matters most on storage- or memory-constrained boards, delete any mode you don't plan to trigger.
- Don't forget the events. A pet does nothing on its own. Use the event editor to add a condition for each mode you want to play, the way we wired the JUMP! button above.
- Mind your device's memory. Animated images need enough RAM to hold their frames. Point your coding assistant at the
README.mdfile in the exported LVGL code, it documents this, or make sure you've allocated enough memory for animated images yourself. If a sprite doesn't appear after flashing, this is almost always why.
Sprites can be heavy. On a small microcontroller, a pet with all 9 modes and large frames can exhaust memory and simply not render. Strip it to the modes you actually use, and confirm your LVGL configuration allocates enough RAM for animated images.
Where to go next
- What is a sprite?, the concept behind pets: modes, frames, and durations.
- Using the event editor, every trigger and action for making a pet react.
- Guide to libraries and reusable components, publish a pet once and reuse it everywhere.
- How to submit a pet, create and share your own unique pet with the community.
- Pets gallery, browse the community pets and grab another.