Overview
This guide walks you through everything you need to know about sprites in PicoPixel: what they are, when to reach for one, how to build your own step by step, how to make it react to what's happening on screen, and how to reuse it so you never have to build the same thing twice.
No prior animation experience needed, if you can drag and drop an image, you can make a sprite.
What?
A sprite is a single PicoPixel widget that holds several different animations and lets you switch between them whenever you want. Each animation is called a mode or state, for example "Idle," "Running," or "Happy."
Think of it like a character in a video game. The character is one thing on screen, but it can walk, jump, or wave depending on what's happening. A sprite works the same way: one widget, many looks, and you decide which one plays.
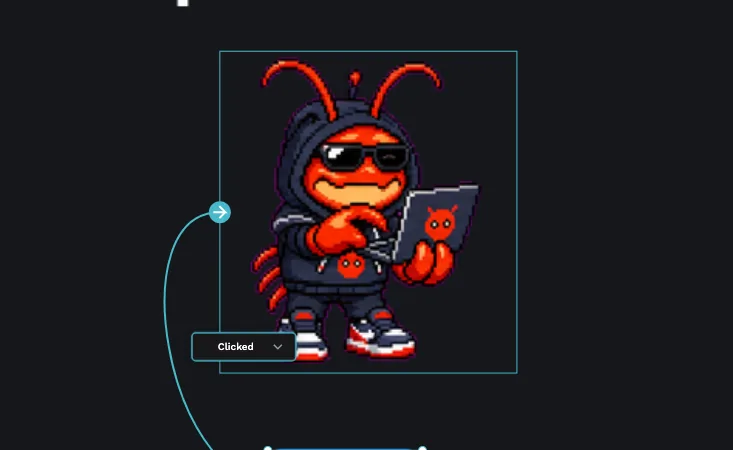
Using PicoPixel's powerful event editor you can trigger different states to give your sprite a spark of life!
Example: Suppose you have an animated character, or you want to make your own stack-chan face for your ESP32 or other LVGL application. You can use a single sprite and conditionally trigger different modes such as "Running," "Thinking," "Failed," and more, all without juggling a pile of separate widgets.
On a technical level, LVGL does not natively support sprites with different states, so we built our own based on the LVGL animated image widget. You get the convenience without having to wire any of it up yourself.
When should I use a sprite?
Not every image needs to be a sprite. Here's a quick way to decide:
- A single, still picture? Use a regular Image. Sprites are overkill for something that never moves.
- One animation that just loops forever (like a spinning loader)? Use an Animated Image. It's simpler and lighter.
- Something that needs to change based on what's happening, a face that smiles when a task succeeds, or a character that switches from idle to running? That's exactly what a sprite is for.
The rule of thumb: if your graphic has more than one "mood" or "behavior" and you want to switch between them, reach for a sprite.
How to create a sprite?
- Select the "Sprite" widget. In the right sidebar you can add your first mode of that sprite. For example, maybe the first state is "Idle." Give each state a clear name so you'll recognize it later when you set up triggers.
- Upload an image sequence, the set of frames that make up this mode. Each frame is just one picture, and playing them in order is what creates the animation, like a flipbook.
- You can adjust the duration for that specific state. A longer duration plays the animation more slowly; a shorter one speeds it up.
- Add another state. A minimum of 2 modes are required. (If you only ever need one animation, you're better off using the Animated Image widget, see When should I use a sprite? above.)
- Use the Events tab/editor to conditionally trigger and toggle between your different states. This is what makes the sprite feel alive, more on that in the next section.
All images or frames must share the exact same dimensions across every mode of a sprite. If one frame is 64×64 and another is 80×80, the sprite won't line up correctly. Resize them to match before uploading.
Keep your frame count and image size reasonable. More frames and bigger images look smoother but use more memory on your device, something to keep in mind for small microcontrollers. See Common issues if your sprite doesn't show up after flashing.
Bringing your sprite to life
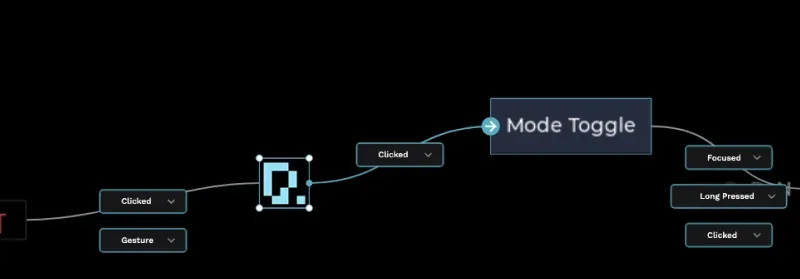
A sprite that only ever shows one state isn't doing much. The magic happens when you tell it when to switch, and that's what the Events editor is for.
The idea is simple: when something happens, switch to a state. You pick the "something" (a button press, a value changing, a timer, etc.) and PicoPixel handles the rest.
A typical example:
- Your sprite starts on the "Idle" state by default.
- In the Events editor, you add an event: when a button is pressed, switch the sprite to the "Running" state.
- Add another event: when the task finishes, switch to "Happy" (or back to "Idle").
That's it, your sprite now reacts to what the user does, with no code on your part. You can chain as many of these as you like to build genuinely expressive widgets.
Start small. Get two states switching back and forth first, confirm it looks right in the preview, then add more states once you're happy with the behavior.
How to re-use a sprite?
Once you've built a sprite, you probably don't want to rebuild it from scratch in every project. The Library feature lets you save it once and drop it into any project.
- Right-click your completed sprite widget and click "Add Library Widget."
- This creates a reusable entry in your library on the Assets tab. Think of it as your personal shelf of ready-made widgets.
- To move that library between projects or share it with a teammate, go to Library and click Export.
- Now when you create a new project or open an existing workspace, you can import that library and drop the sprite straight in: no rebuilding required.
- All frames, durations, and states sync perfectly from the original copy you made, so it behaves exactly the same everywhere you use it.
Common issues
The sprite does not appear when flashed to the device.
- This is almost always a memory issue: your device needs enough RAM to hold the sprite's image frames.
- This is set in your LVGL configuration and isn't something PicoPixel can change for you, it depends on your specific board.
- The exported
README.mdfile notes this, so your AI assistant can help you update the SDK/LVGL config for your embedded device.
The frames look misaligned or jump around.
- Double-check that every frame in every state has the exact same dimensions. Even a few pixels of difference will throw off the alignment.
The animation plays too fast or too slow.
- Adjust the duration on the affected state. Remember each state has its own duration, so you may need to tune them individually.
The sprite won't let me save it / asks for another state.
- A sprite needs at least 2 states. If you only have one, either add a second state or switch to the Animated Image widget instead.